The guide below goes through step by step which settings you can make for a user template:
Attention: User templates do not prohibit a Myfone user from changing their settings.
This means that all users who have been assigned a template, are still able to change alle settings as they wish.
Therefore, remember that if you push out the same template, to another Myfone user, the users settings will be replaced with the templates settings.
A. General
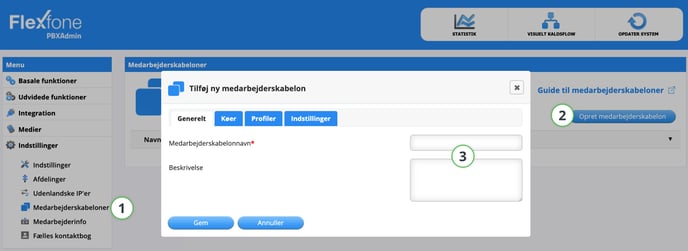
1. Go to PBXAdmin.dk > Indstillinger > Medarbejderskabeloner.
2. Click on Opret medarbejderskabelon.
3. Give the template a name.
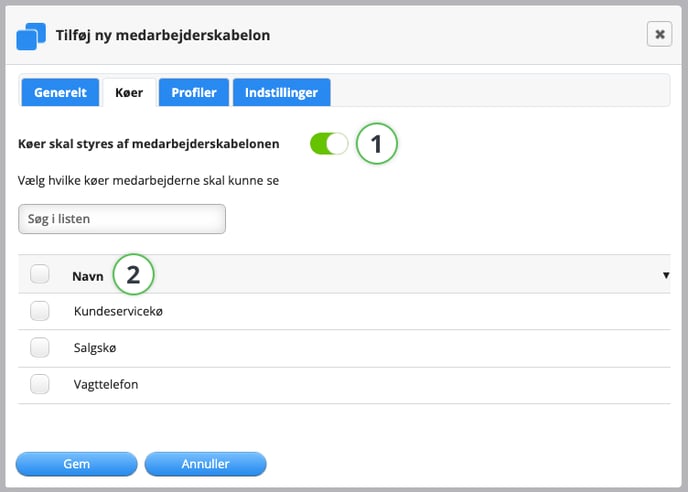
B. Queues
1. Open the tab Køer (queues). Choose which queues should be managed by the template.
2. If you want the template to manage your queues, you can choose which queues the template should manage, and which queues the user can see on Myfone.dk.
C. Profiles
Under the Profiler (Profiles) tab, you can choose whether profiles should be controlled by the user template. If they are to be, you can make a number of settings regarding profiles.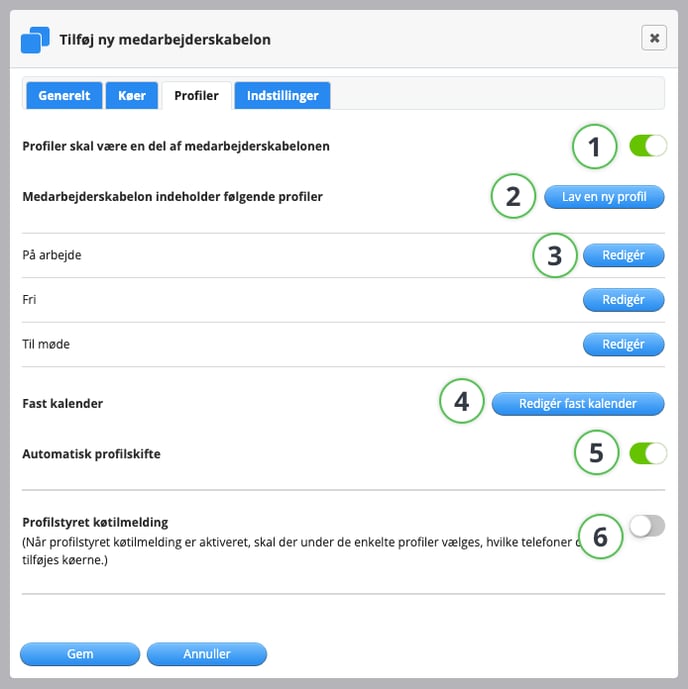
| 1. Profiles should be part of the user template | Here you can activate/deactivate whether profiles should be part of the user template or not. |
| 2. Create a new profile | Here you can create a new profile. |
| 3. Edit | Here you can edit the three standard profiles (At work, Meeting and Off). |
| 4. Edit fixed calendar | Here you can edit the fixed calendar. |
| 5. Automatic profile switch | Here you can activate/deactivate automatic profile switch. |
| 6. Profile-controlled queue registration | Here you can activate/deactivate profile-controlled queue registration. |
Create a new profile/edit profile
1. If you create a new profile, you must enter a profile name, possibly add a description, and choose an icon for the profile. Then you have the same options regardless of whether you create a new profile or edit an existing one.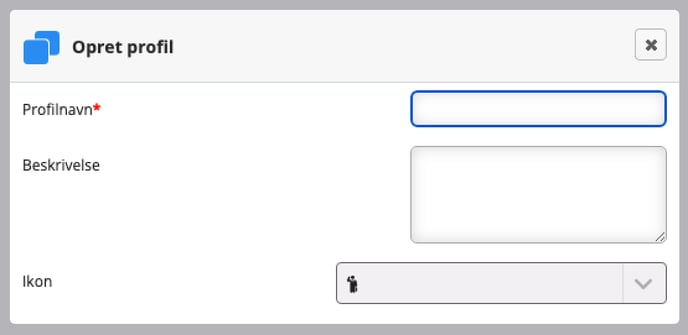
2. First, settings for incoming calls on the profile in question must be selected. It is structured in the same way as profile setup on Myfone. In the example below, it is chosen that the local number should always call the employees' mobile phone and in Microsoft Teams. If the call is not answered, it should go to the employee's voicemail with the standard message after 15 seconds. In the same way, the settings are chosen for incoming calls for mobile and landline numbers.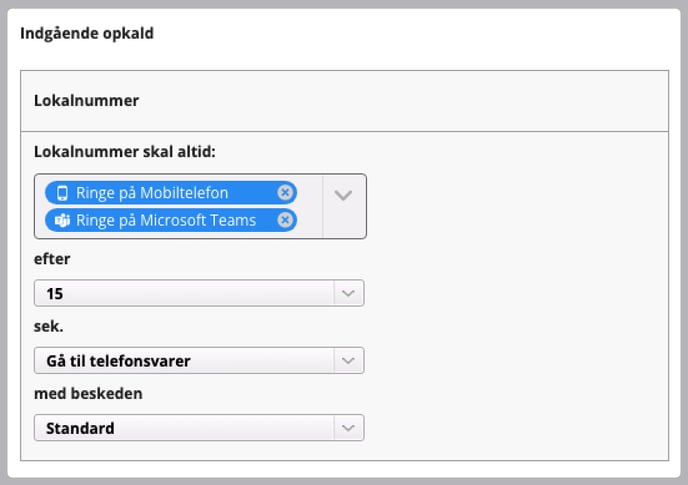
3. Then settings for outgoing calls for the individual devices must be selected.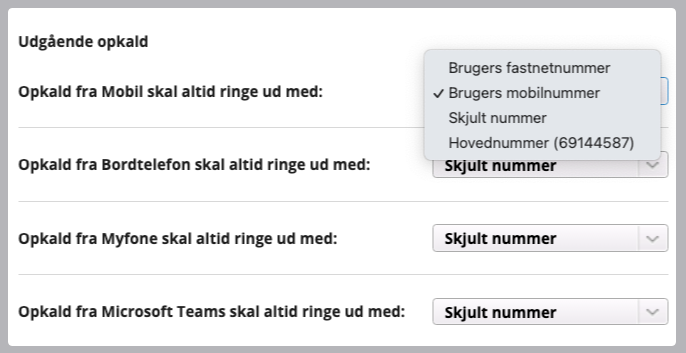
4. If Profile-controlled queue registration is chosen to be activated in the template, you can finally choose settings for it.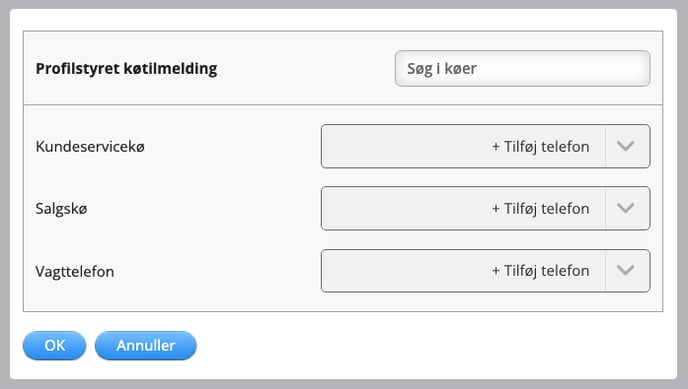
Fixed Calendar
1. Under Fixed Calendar, you can set up how the fixed calendar should look, so the profiles switch after it.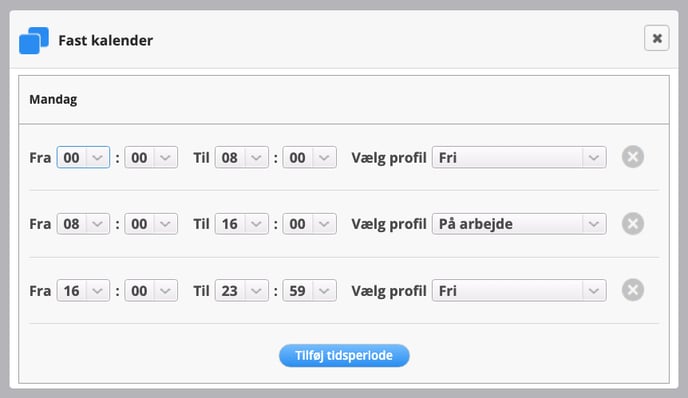
If profiles are included in a user template, it overwrites all the profile settings that the employees in question have previously chosen on Myfone (including any other profiles that the employees have had) and replaces it with the settings you have chosen in the template.
D. Settings
- Under the Indstillinger (Settings) tab, you can also set up a number of settings that will apply to the employees that the template is rolled out to.
Example based on the Call Waiting function. Here you have the following options:
- Not part of the template (the function is not affected by the user template and therefore uses Myfone's default setting or the employee's chosen setting)
- Activated (activates the function for employees in the template)
- Deactivated (deactivates the function for employees in the template)
- After selecting the desired settings, click Gem (Save).

E. Publish the user template
-
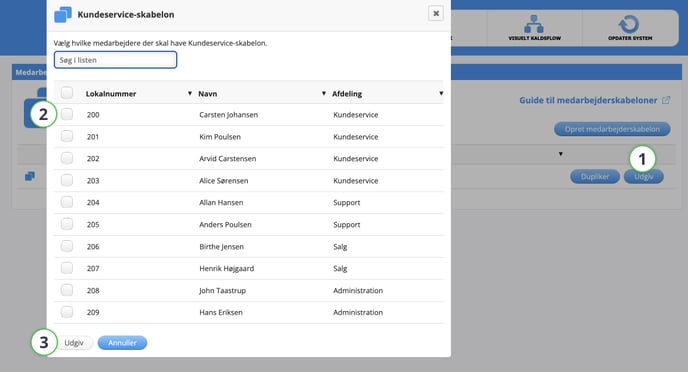
Then click Udgiv (Publish) next to the template.
-
Choose which employees should have the template. You can search for employees or departments and also easily choose all the company's employees at once.
-
Finally, click Udgiv (Publish).
Now the user template is created, and the selected settings are rolled out to the selected employees. You can always go back and edit the template or delete it completely (changes to the template have no effect on existing employees before it is rolled out again).
If several user templates are rolled out to the same employee, it is the last published that applies.